WHAT YOU NEED
- Espresso coffee machine
- Coffee grinder or ground coffee
- Coffee tamper and tamp mat
- Clean dry cloth or microfiber cloth
- Your favourite cup
STEP 1: Switch on your coffee machine to heat it up, make sure the water container is full of fresh water (if not connected to mains water)
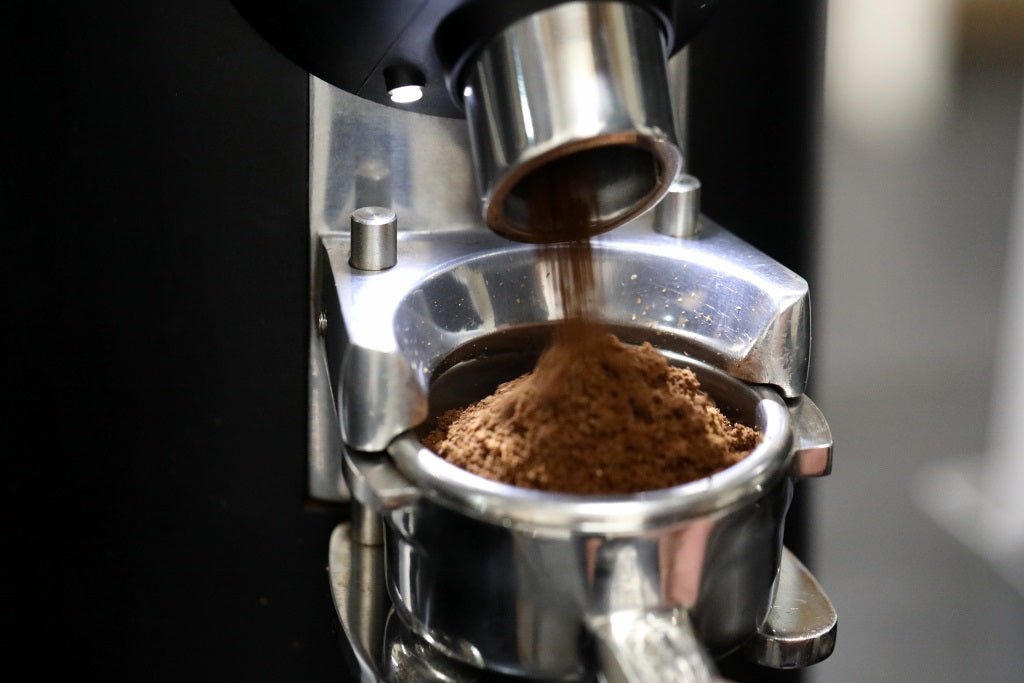
STEP 2: Add fresh coffee beans to your grinder and grind off a small amount of coffee to clear out the old coffee. Use a fine grind for espresso coffee
STEP 3: Remove the Group Handle from the coffee machine and run water through for a few seconds. This heats up the shower screen and rinses away any coffee from the previous shot
STEP 4: Use a dry, clean cloth to wipe out the inside of the filter basket in the group handle to make sure it is clean and completely dry
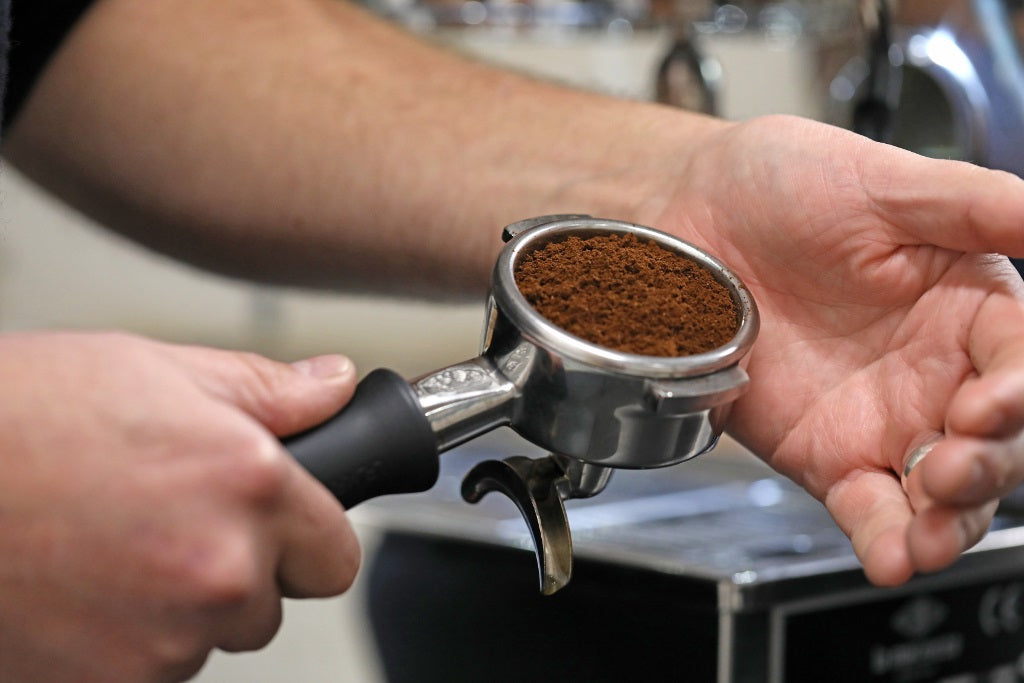
STEP 5: Fill your filter basket with freshly ground (or finely pre-ground) coffee until it is level with the top of the basket. Gently distribute the coffee in the basket so that the grounds make an even, flat even surface. This can be done by tapping on the base/side of the basket or using a distribution tool. For better consistency and results view our dosing guide LINK TO WEIGHING & DOSING GUIDE
- Grind size is essential to preparing good espresso as it controls how quickly or slowly the water flows through the coffee and the coffee is extracted.
- It is important to note: The finer the grind size the longer it takes for water to pass through the coffee. Alternatively the coarser the grind the faster the water will pass through the coffee
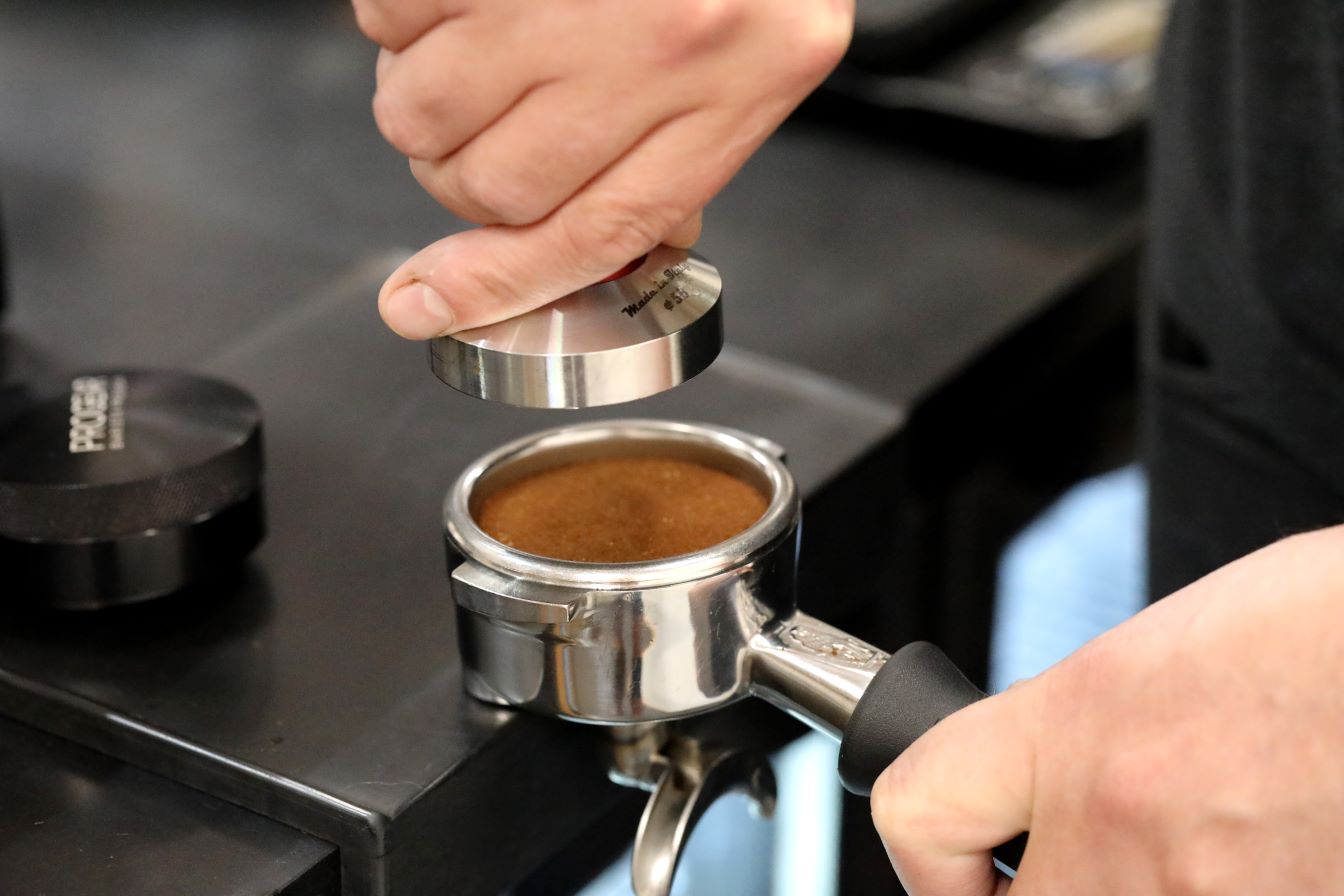
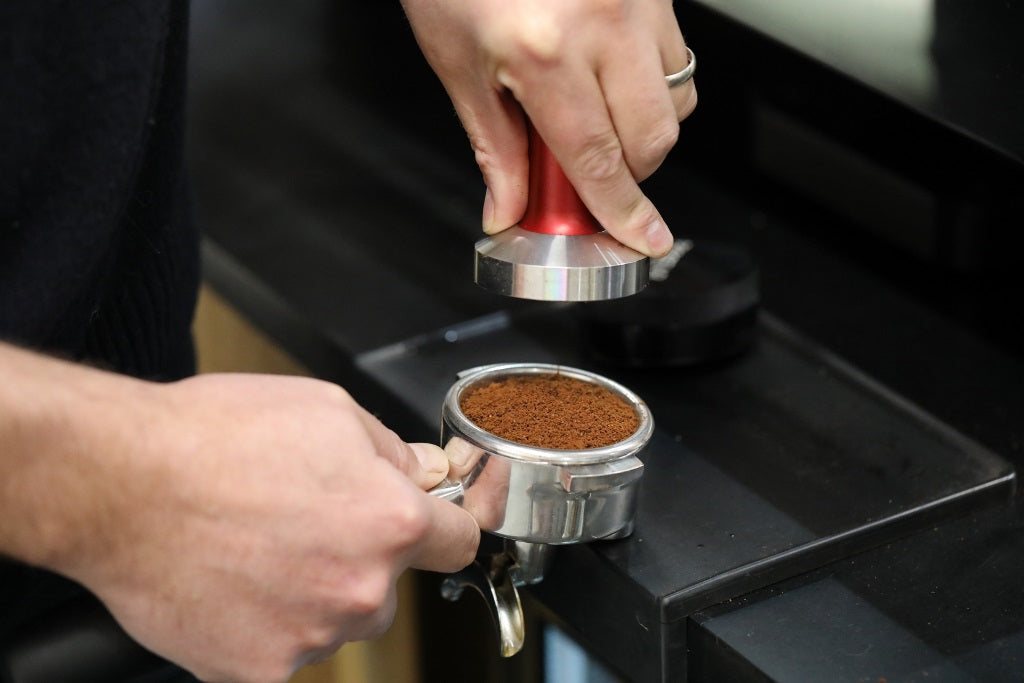
STEP 6: Pick up your tamper and place your thumb and fore finger on either side, to ensure even pressure. Place the base of the group handle basket on a flat, stable surface and evenly push down the tamper onto the coffee to create a flat level surface. Tamp firmly enough that you feel the resistance of the bench under the handle. Clean off loose grinds around the top of the basket

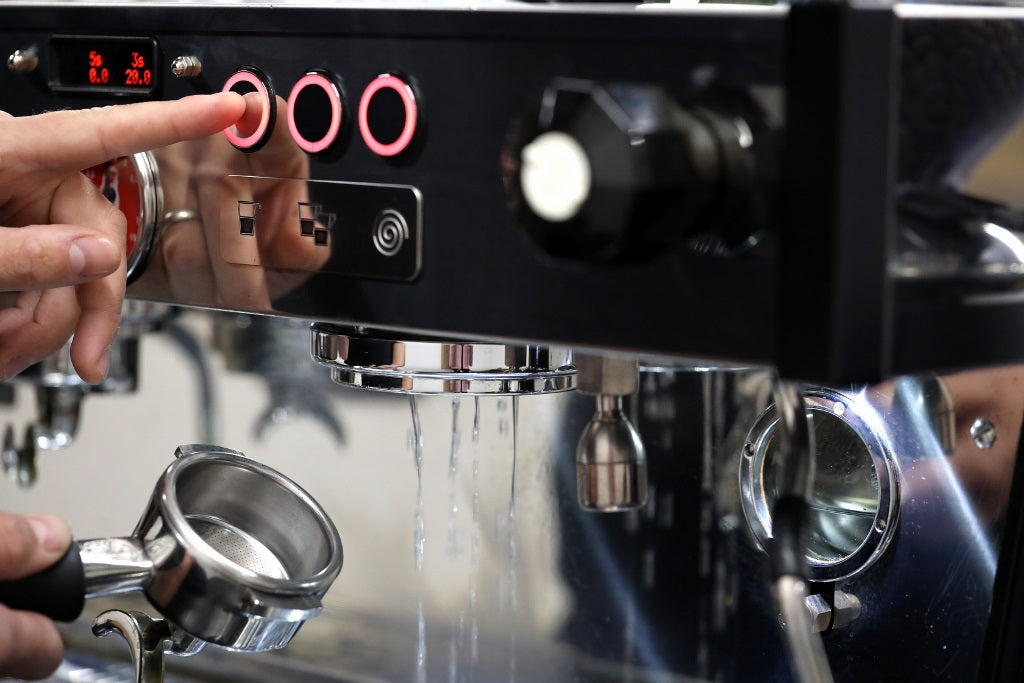
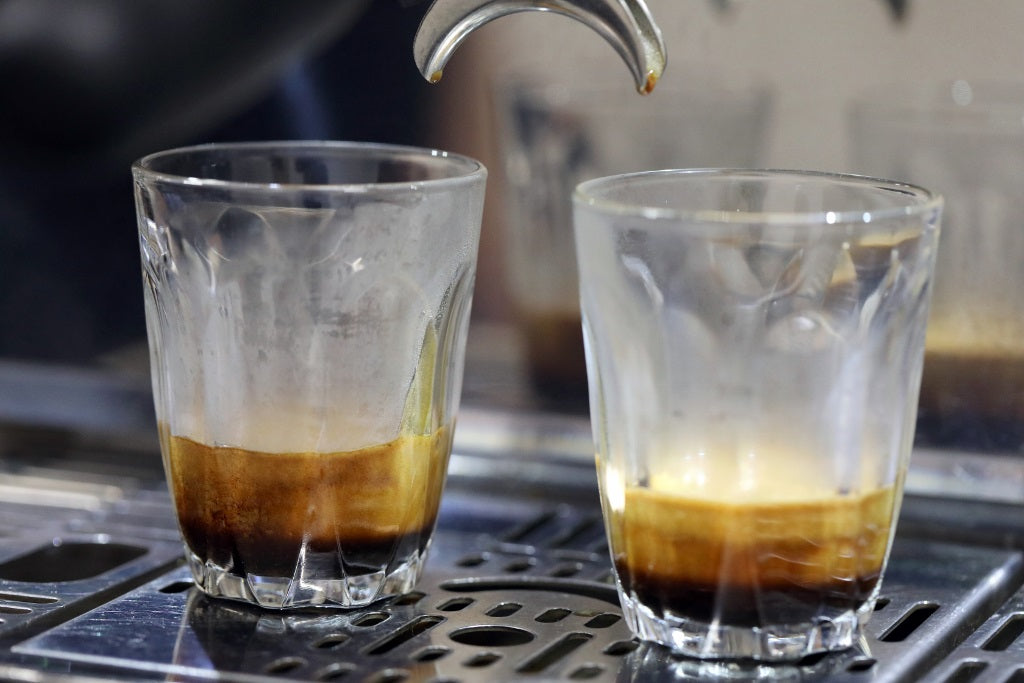
STEP 7: Flush a small amount of water through the shower screen. Secure the handle into the pre-heated group head. Place a cup underneat the spouts and press the desired programmed button to start the espresso extraction.
- There should be a short delay before the coffee pours, between 5-7 seconds. Then the first of the crema will begin to drip from the spout(s)
- After the initial drips, the bulk of the espresso will flow it should have a golden, honey like consistency and colour
- The flow will then taper and the liquid will be lighter in colour
- The extraction should take between 20 - 30 seconds to run, this can be adjusted by changing the grind size and brew recipe
If you are timing the extraction start the timer when you press the button. For better consistency and results view our dosing guide LINK TO WEIGHING & DOSING GUIDE

A good espresso extraction made with fresh coffee will have a nice layer of crema on top, crema is the name for when the coffee bean oils and CO2 are combined under pressure
STEP 8: Remove the handle, knock out the coffee, wipe out the filter basket with a clean, dry cloth. Reinsert the handle and then you are ready to go again
STEP 9: Find yourself a comfy spot, sit back and enjoy your brew
Troubleshooting
"My coffee pours out too fast" If you find that your coffee is pouring out as soon as you hit the go button then you’ll need to adjust your grinder to make it grind finer
“When I push the button nothing comes out"
If no coffee is coming through after the first 8-10 seconds stop the shot and adjust your grinder to make the grind coarser/larger in particle size
“My shot only comes out one side of the spout"
If you find that your shot is coming out of one spout more then the other repeat the shot and focus on getting your distribution and tamping flat and even